How to Triple Boot (Windows & Ubuntu & Kali) !!
Windows is widely used for its ease of use, while Ubuntu is popular for open-source, Kali Linux is a popular penetration testing and ethical hacking.
Table of contents
- Step 1: Boot from the UEFI installation media
- Step 2: Choose the UEFI installation option
- Step 3: Create a partition for Windows
- Step 4: Complete the installation
- Installing Ubuntu!!
- Step 1: Prepare a bootable USB drive
- Step 2: Create a partition for Ubuntu
- Step 3: Boot from the USB drive
- Step 4: Install Ubuntu
- Step 5: Complete the installation
- Installing Kali!
- Step 1: Prepare a bootable USB drive
- Step 2: Create a partition for Kali
- Step 3: Boot from the USB drive
- Step 4: Install Kali
- Step 5: Complete the installation
- Conclusion
Triple booting Windows, Ubuntu, and Kali Linux on your computer can be a great way to take advantage of the strengths of each operating system. Windows is widely used for its ease of use and compatibility with many applications, while Ubuntu is popular among developers and those who value open-source software. Kali Linux is a popular penetration testing and ethical hacking distribution that is used by security professionals. In this blog, we will guide you through the steps to set up a triple boot system with Windows, Ubuntu, and Kali Linux.
Before you begin, make sure to back up any important data on your computer, as the installation process involves partitioning your hard drive, which can result in data loss if not done correctly.
Make sure your computer supports UEFI and that you have a UEFI bootable installation media for Windows. You can download a UEFI-compatible Windows ISO file from the Microsoft website and create a bootable USB drive using a tool like Rufus.
Step 1: Boot from the UEFI installation media
Insert the UEFI bootable USB drive into your computer and restart it. Press the key to enter the boot menu (usually F12 or Del) and select the USB drive as the boot device.
Step 2: Choose the UEFI installation option
When the Windows Setup screen appears, select the language, time and currency format, and keyboard or input method you want to use. Click Next and then click Install Now. On the next screen, select the option to install Windows in UEFI mode.
Step 3: Create a partition for Windows
Follow the prompts to accept the license terms and choose the type of installation you want (Custom or Upgrade). If you choose Custom, you will be prompted to select the partition where you want to install Windows. Click on the unallocated space on your hard drive and click New to create a partition for Windows. Make sure to select the partition type as GPT (GUID Partition Table). Make sure to have min 30 GB of free space because we need to install Ubuntu and kali on our system.
Step 4: Complete the installation
Follow the remaining prompts to set up your username, password, and other settings. Once the installation is complete, restart your computer. You should now be able to boot into Windows in UEFI mode.
Now you need to check that your PC is booted in UEFI Mode successfully.
So, Press windows+r and type msinfo32, and press enter.


Installing Ubuntu!!
Step 1: Prepare a bootable USB drive
The first step is to create a bootable USB drive containing the Ubuntu installation files. You can download the Ubuntu ISO file from the official website and use a tool like Rufus or Etcher to create a bootable USB drive.
To Download Ubuntu visit here.

To Download Rufus visit here.


Step 2: Create a partition for Ubuntu
The next step is to create a partition on your hard drive for Ubuntu. To do this, open the Disk Management tool in Windows by pressing the Windows key + X and selecting Disk Management from the menu. Right-click on the partition you want to shrink and select Shrink Volume. Specify the amount of space you want to allocate to Ubuntu and click Shrink. We need an unallocated partitioning of more than 10 GB for installing Ubuntu. Create a temporary partition for kali of a minimum of 10 GB in size and allocate it for now.
Step 3: Boot from the USB drive
Insert the USB drive into your computer and restart it. Press the key to enter the boot menu (usually F12 or Del) and select the USB drive as the boot device.

Step 4: Install Ubuntu
The Ubuntu installer will now start. Select your language and click Install Ubuntu. Follow the prompts to select your time zone, keyboard layout, and network settings. When you reach the Installation type screen, select the option to Install Ubuntu alongside Windows. Choose install Ubuntu alongside bootloader and click Install Now.


Make sure to checkmark install third-party software.

Step 5: Complete the installation
Follow the remaining prompts to set up your username, password, and other settings. Once the installation is complete, restart your computer. You should now see a GRUB menu giving you the option to boot into either Ubuntu or Windows.

Congratulations, you have successfully set up a dual boot system with Windows and Ubuntu!
Installing Kali!
Step 1: Prepare a bootable USB drive
The first step is to create a bootable USB drive containing the Kali installation files. You can download the Kali ISO file from the official website and use a tool like Rufus or Etcher to create a bootable USB drive. Make Sure to disable your antivirus before creating an installation media.
To Download Kali visit here.

To Download Rufus visit here.
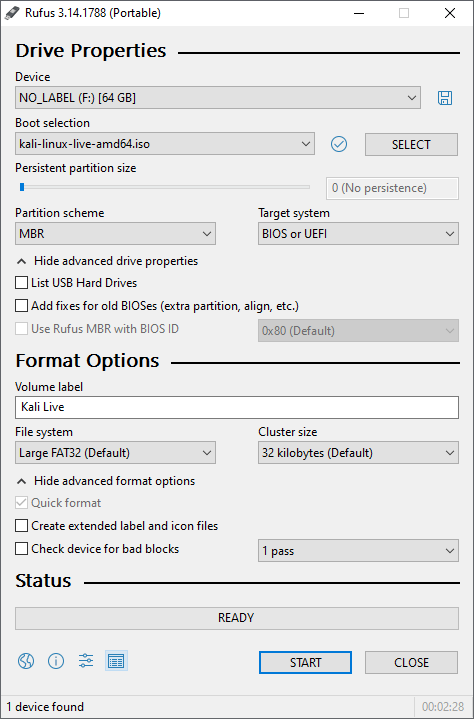
Step 2: Create a partition for Kali
The next step is to create a partition on your hard drive for Kali. To do this, open the Disk Management tool in Windows by pressing the Windows key + X and selecting Disk Management from the menu. Right-click on the partition you allocated temporarily for Kali and just unallocate it.
Step 3: Boot from the USB drive
Insert the Kali Linux bootable USB drive into your computer and restart it. Press the key to enter the boot menu (usually F12 or Del) and select the USB drive as the boot device.
Step 4: Install Kali
The Kali Linux installer will now start. Follow the prompts to select your language, time zone, keyboard layout, and network settings. Choose the partition you created earlier for Kali Linux and click Continue. Follow the prompts to complete the installation.
Follow Steps Given Below:
To start your installation, boot with your chosen installation medium. You should be greeted with the Kali Linux Boot screen. Choose either Graphical install or Install (Text-Mode). In this example, we chose the Graphical install.
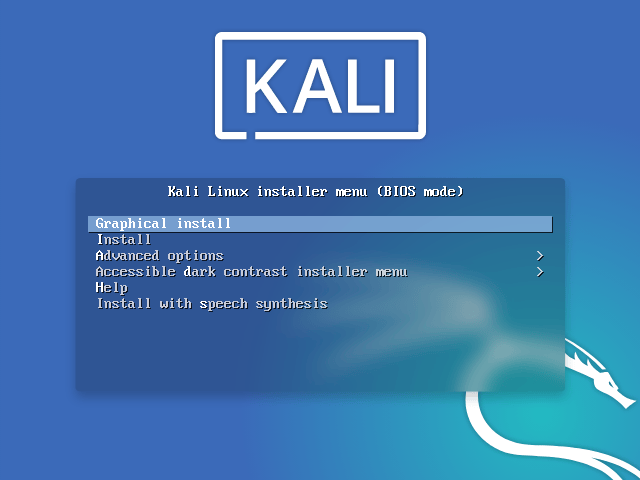
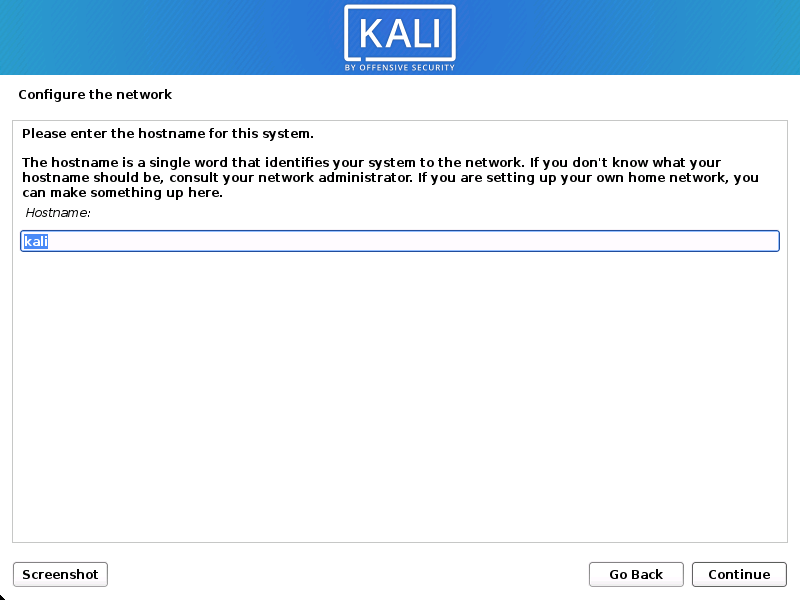
Enter the Host Name as Kali or any hostname you want to enter.
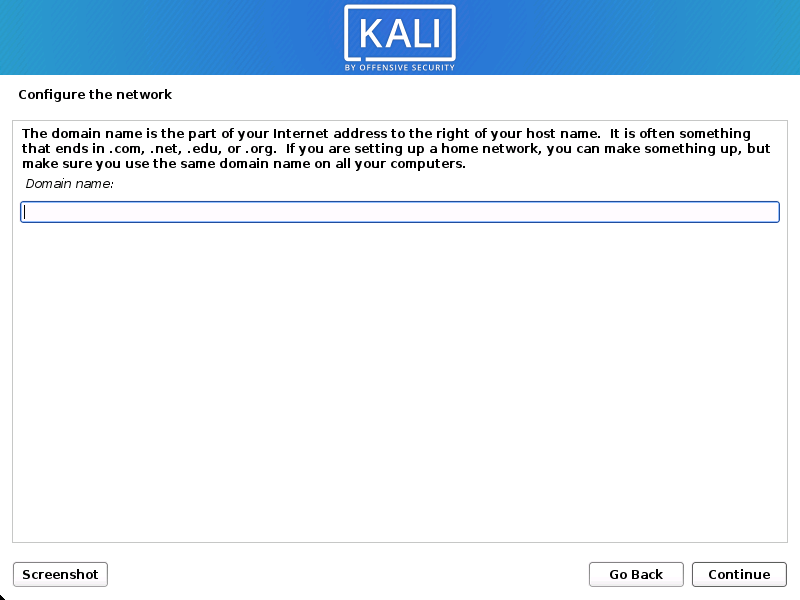
You may optionally provide a default domain name for this system to use (values may be pulled in from DHCP or if there is an existing operating system pre-existing).
Next, create the user account for the system (Full name, username, and a strong password).
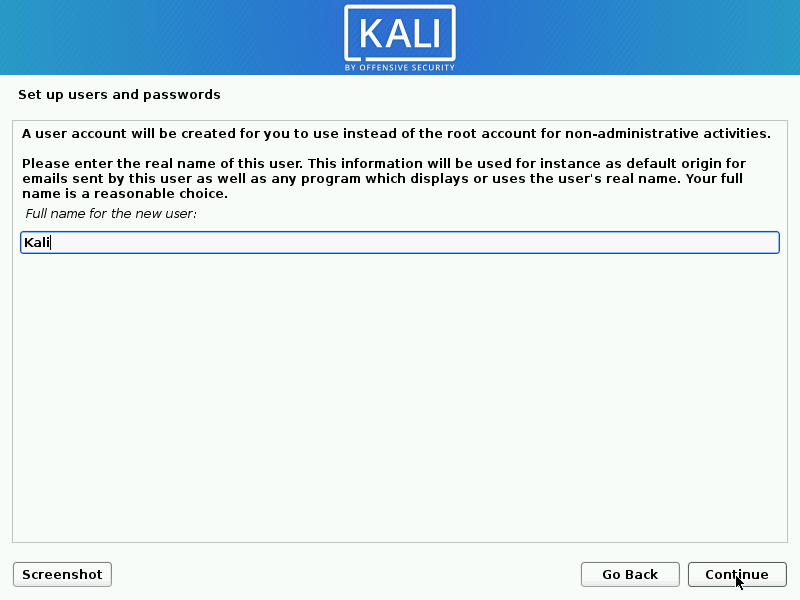
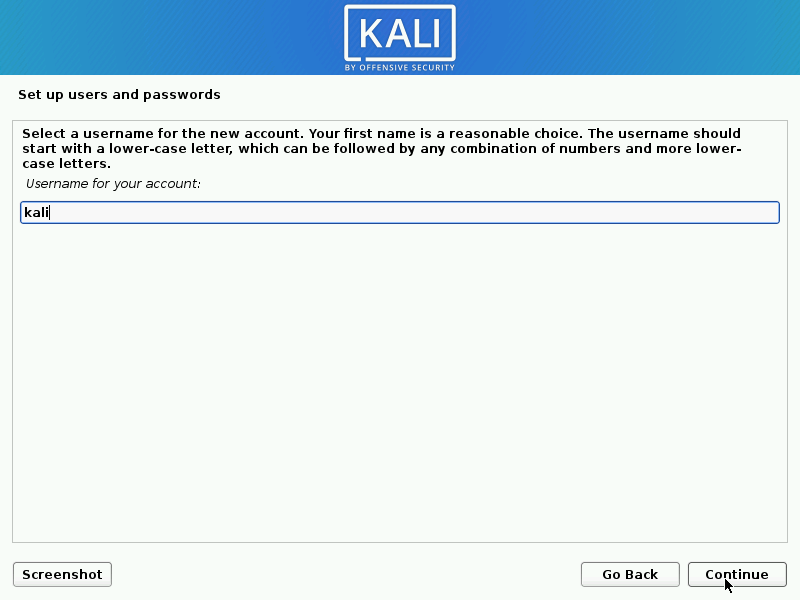
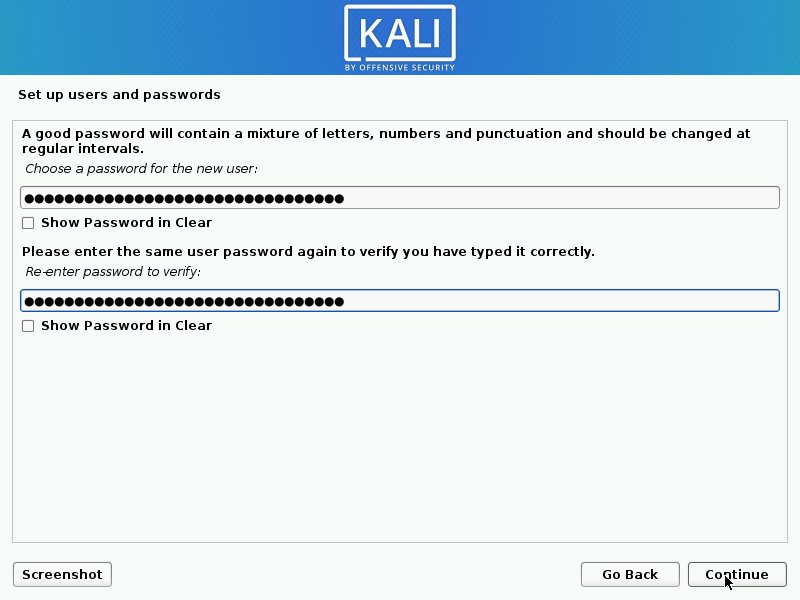
Just proceed by pressing next to enter the needed information. now select Use largest continuous partition in order to use our space that was unallocated.
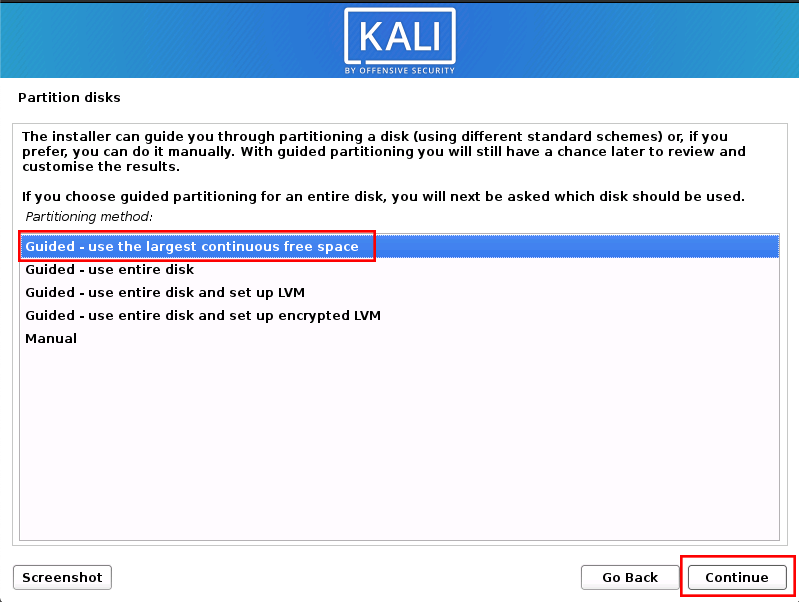
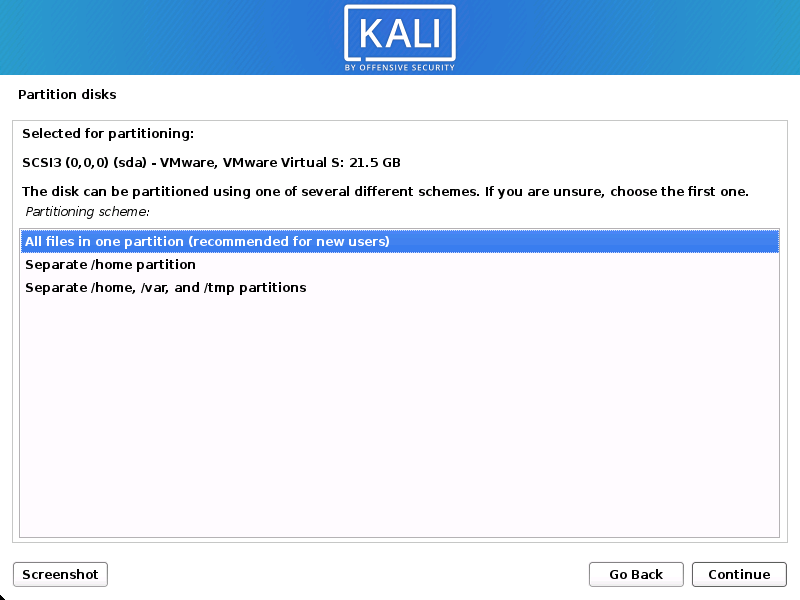
You just need to select the same options As selected in the images.
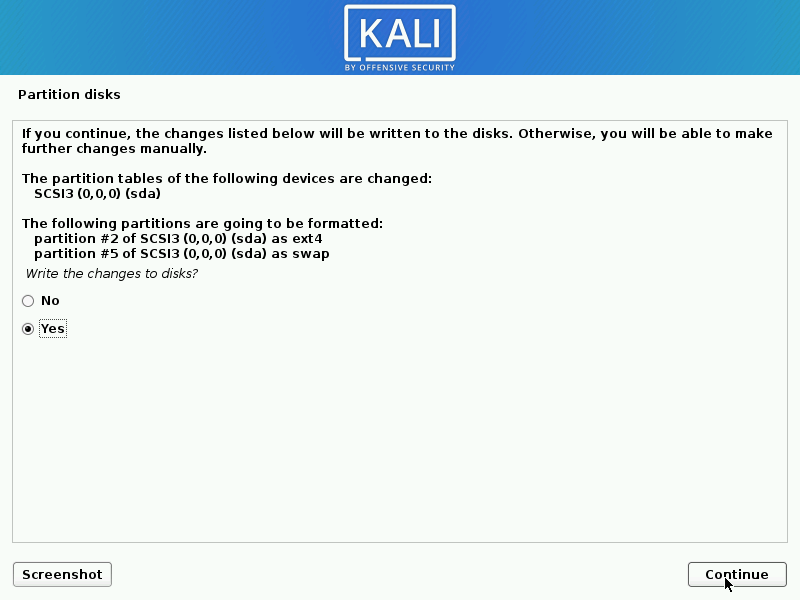
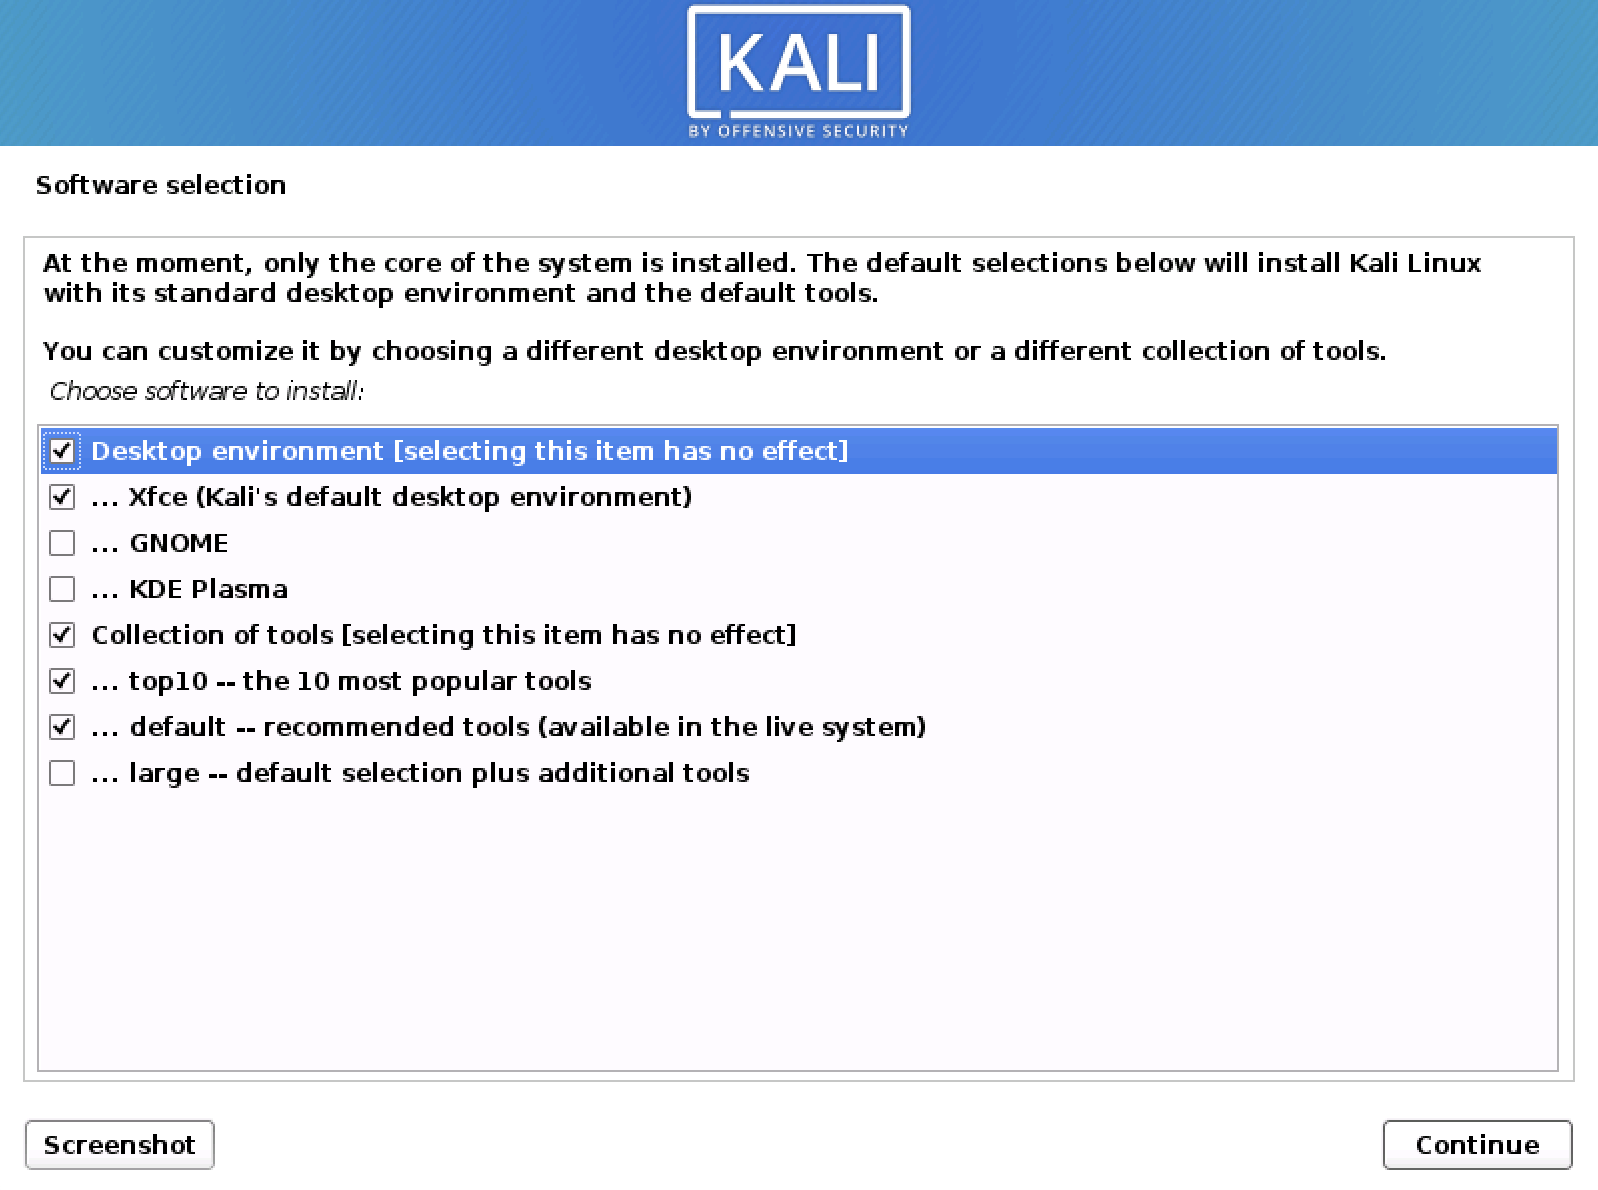
Step 5: Complete the installation
Once the installation is complete, restart your computer. You should now see a GRUB menu giving you the option to boot into Windows, Ubuntu, or Kali Linux.

Congratulations, you have successfully set up a triple boot system with Windows, Ubuntu, and Kali Linux
Conclusion
In conclusion, triple booting Windows, Ubuntu, and Kali Linux can be a great way to get the best of all three operating systems. By following these simple steps, you can easily install Ubuntu and Kali Linux alongside Windows and enjoy the benefits of all three. Just remember to back up your data before you begin and be careful when partitioning your hard drive.
Make Sure to Like and Follow my Bog.
Get to Know about me better here.

